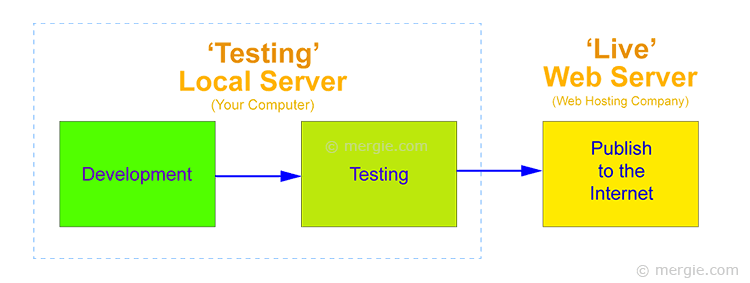
Part 1 – Install a Testing Server
It’s easy to install a testing server if you install one of the free ready made open source AMP, or LAMP packages (Linux, Apache, MySQL, PHP/Perl/Python).
This article is split into four parts:
- Part 2 – Getting Ready to Install WordPress.
- Part 3 – Install WordPress on a Testing Server.
- Part 4 – A WordPress Installation Error?
Topics:
- Download a Testing Server package:
- Video of a Testing Server Being Downloaded:
- Installing the Testing Server Package:
- Video of the Testing Server (XAMPP) installation Process:
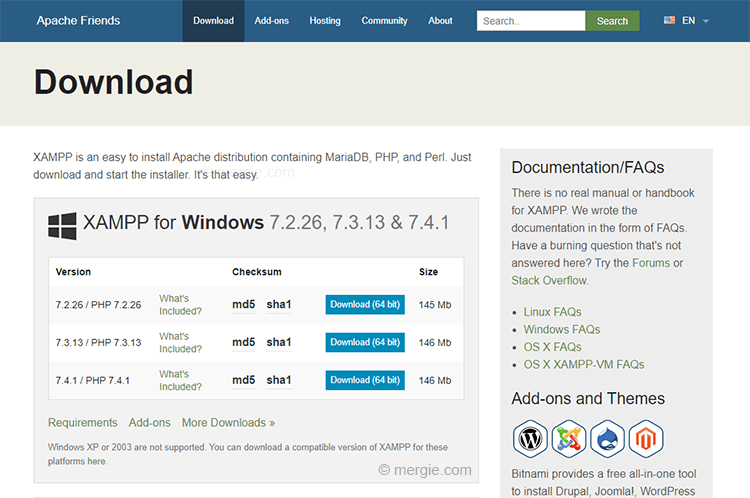
Download a Testing Server package:
Download your chosen local web server package. There are various free, open source packages available:
- XAMPP (windows, Linux & OSX).
- MAMP (windows & OSX).
- A list of other AMP (Apache, MySQL, PHP) packages can be found on Wikipedia.
You can download all the AMP components individually (Apache, MySQL, PHP), but it is far easier with one of these configured ‘ready to install’ packages.
Video of a Testing Server Being Downloaded:
Notes:
- If the web server package asks which version of PHP, pick one of the more recent version numbers, or check which version your hosting provider uses, (if you have one?).
- You can download a testing server ‘package’ configured to install WordPress at the same time. This is great for single websites, but if you plan to install more than one website, you may want to install individual copies of WordPress, for each site.
Installing the Testing Server Package:
I am going to use XAMPP (an AMP stack) for Windows in this example. XAMPP is one of the most common, open source ‘testing’ server packages available. There is also a video at the bottom of this section, showing the installation process…
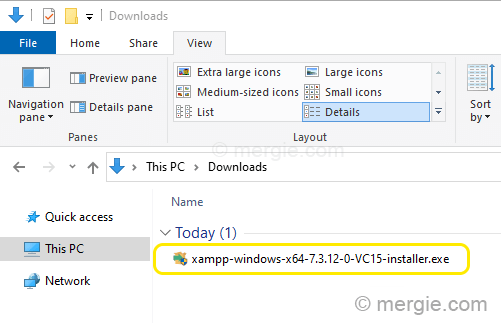
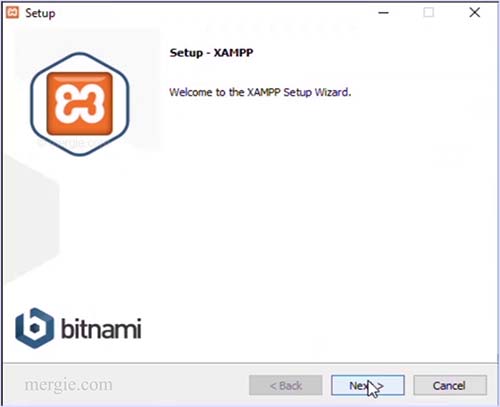
- Open the testing server package (AMP stack) file you downloaded earlier, to start the setup (installation) process.
- If your antivirus is running, you may get a warning message. I’ve not had a problem with this, so I click ‘Yes’ to continue. (If you have any problems, read the text in the warning message).

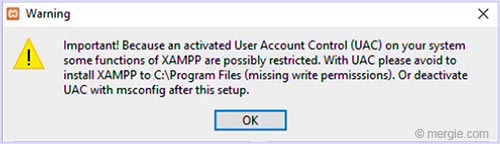
- You may get another warning message about ‘User Account Control (UAC). Again, I have not had a problem with this, so I click ‘Yes’ to continue. (If you have any problems, read the text in the warning message).
- The ‘Setup’ window will now open. Just follow the installation instructions…
- Create a folder for the ‘localhost’ testing server on your computer hard drive. It is useful to call the folder the same name as the type of server package (AMP stack) installed. i.e. XAMPP, MAMP, or WAMP, etc.
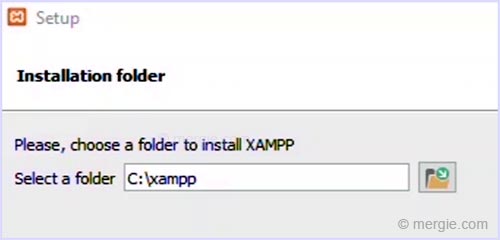
- You can install the testing server in a different location if needed (this is my preference, should I ever need to reinstall Windows).

- Once you have selected your install location, click next.
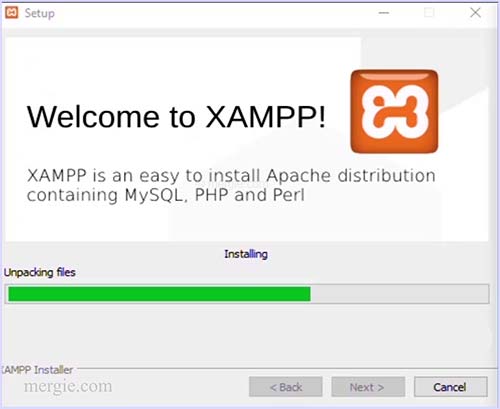
- The testing server package will start unpacking and installing the files.
- Near the end of the installation, XAMPP will ask if you want to ‘start’ the Control Panel? Select the checkbox, as there is still a couple of steps to go, before installation is fully complete (though you can complete it later).
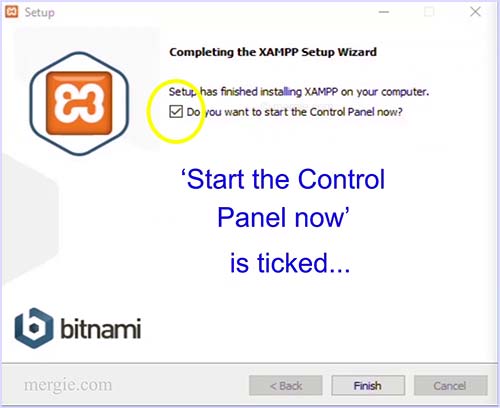
- When the install is complete, a dialogue box will appear for you to select your language preference.
- If you placed a tick in the checkbox for the control panel to open during the install process, the Control Panel will open… This is actually useful, as we need to let the Control Panel applications through the firewall.
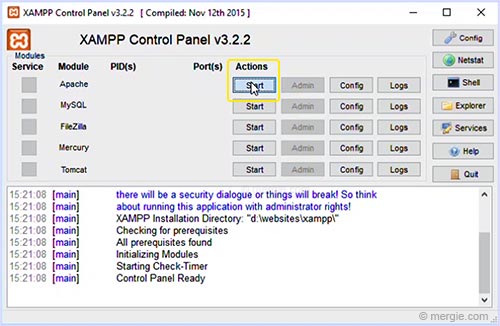
- Start Apache by clicking the ‘Start’ button.
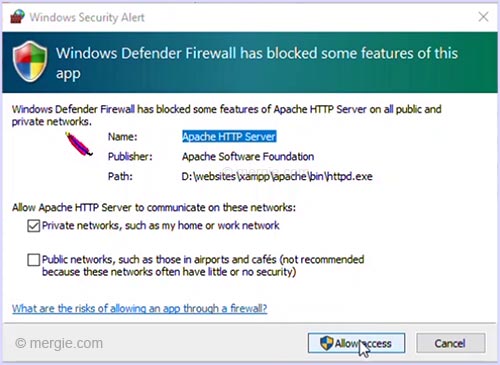
- A ‘Windows Security Alert’ window will open. Let Apache through the firewall by clicking ‘Allow access’.
- As with Apache, Start MySQL, by clicking the ‘Start’ button.
- Another ‘Windows Security Alert’ window will open. Let MySQL through the firewall by clicking ‘Allow access’.
- Your testing server (XAMPP) is now running.

When you Start Apache and MySQL, it means that the server is running. WordPress is a Content Management System (CMS) and needs the server running to work correctly (on a ‘live’ website, the server runs all the time and is pre-installed on the server).
You will need to build your website within this XAMPP server structure (in the htdocs folder), that you have just installed.
Video of the Testing Server (XAMPP) installation Process:
Part 2 – Getting Ready to Install WordPress

Part 3 – Install WordPress on a Testing Server

Part 4 – A WordPress Installation Error?
