Part 2 – Getting Ready to Install WordPress
The other parts in this article are:
- Part 1 – Install a Testing Server.
- Part 3 – Install WordPress on a Testing Server.
- Part 4 – A WordPress Installation Error?
Topics:
- Download WordPress:
- Video of WordPress Being Downloaded:
- Extract WordPress:
- Video Showing Where to Extract WordPress:
- Create a Database (for WordPress):
- Video Showing a Database Being Created in phpMyAdmin:
Download WordPress:
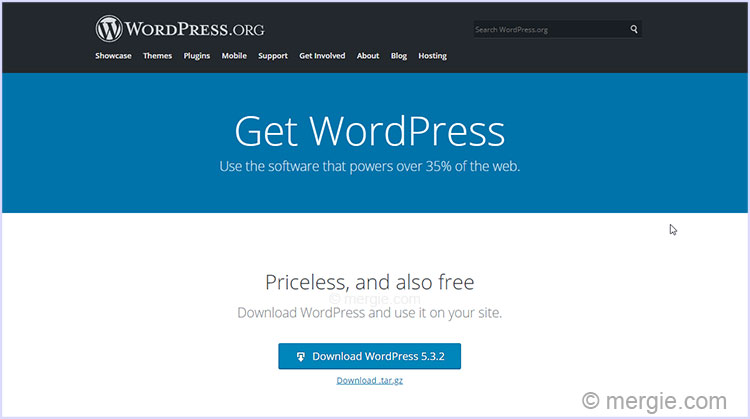
Follow this link to download WordPress. You can download the installation files in various languages.
Note:
The download should be from the .org website, (wordpress.com is a commercial paid, or limited free version).
Video of WordPress Being Downloaded:
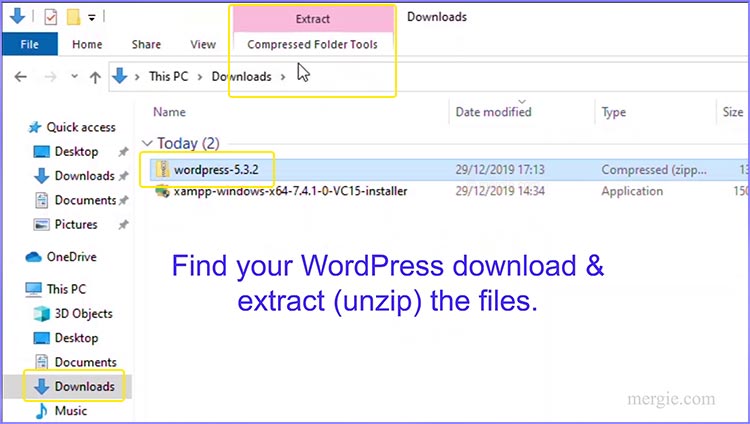
Extract WordPress:
WordPress has to be extracted (unzipped) inside your testing server (AMP stack), or it won’t work. The following describes where you put WordPress and what you need to know…
- Find your WordPress download and extract (unzip) the files.
- Select a destination (for the extracted files).

- This should be inside the htdocs folder of your ‘testing’ server (in this case, htdocs is inside the XAMPP folder structure).
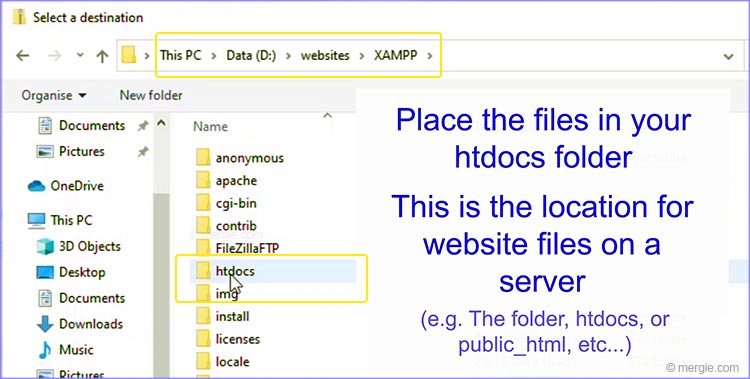
- The htdocs folder (sometimes called ‘public_html’ on a ‘live’ web server) is the location for website files on a server.
- Select the htdocs folder and click ‘Extract’…
- A new WordPress folder should be created.
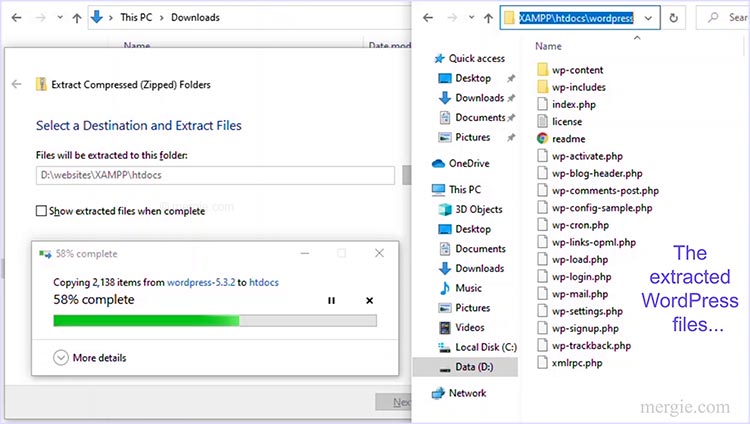
- Go to the extracted WordPress folder and rename it to… The name of your website, (or something similar, like the domain name).

- This is your new ‘site’ folder.
Video Showing Where to Extract WordPress:
Create a Database (for WordPress):
Before we can install WordPress, we need to create a database…
The database for a WordPress installation is created in the testing server, using ‘phpMyAdmin’. This is accessed through the testing server Control Panel, or by typing ‘localhost‘ in your browser address bar (see below).
Important (Best Practice):
When you create a database, it is a good idea to setup your ‘testing’ Server database and future ‘live’ server database so they are identical. I.e. The following parameters should be the same in both locations:
- Username.
- Password.
- Hostname.
- Database name.
- Table prefix.
This is so your ‘Testing’ Server and ‘Live Site’ mirror each other. This will make life far easier when you eventually upload your website data to a ‘live’ web server, or when backing up and updating.
Therefore treat the logon details on a ‘testing’ server as if it was your actual ‘live’ website.
If the passwords, database and table name prefix do not match when you install your ‘live site’ and upload your data, you will get errors, (the worst case being the site fails to operate). You can go into the database and WordPress and change everything to match to get it working, but it just means a lot more work.
Note:
Also apply the same logic when creating the WordPress login during the WordPress install…
Open phpMyAdmin:
With the XAMPP control panel running…
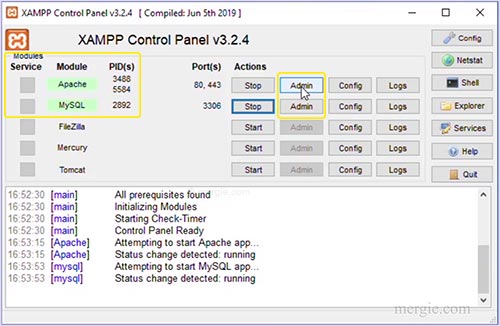
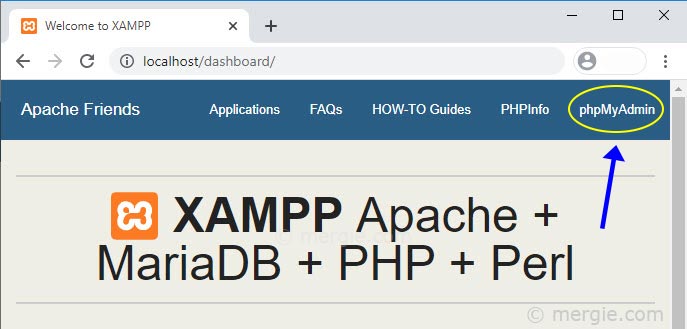
- Click on the Apache ‘Admin’ button. This will take you to the phpMyAdmin screen in your browser, or just type ‘localhost‘ in your web browser url address bar. This will show up as http://localhost/dashboard/ in the url address bar.
Note: The link will only work if your testing server (such as XAMPP) is running.
- Select phpMyAdmin (on the far right of the page).
- Or, click on the MySQL ‘Admin’ button. This will take you straight to phpMyAdmin.
Create a User Account:
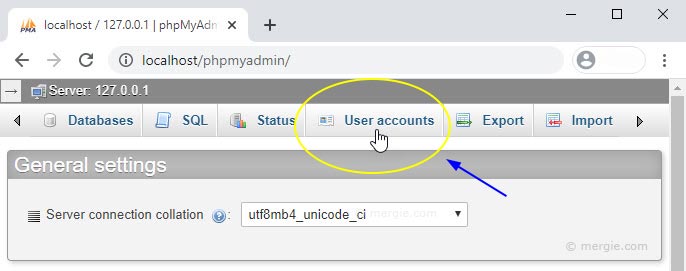
- Look for the User accounts tab and click on it.
- If you don’t already have a User account, scroll down, and under ‘New’ add a new user account.
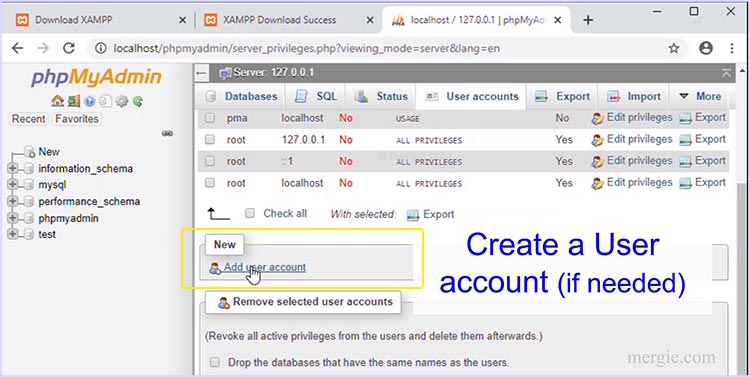
- Enter the ‘Add user account’ login information.
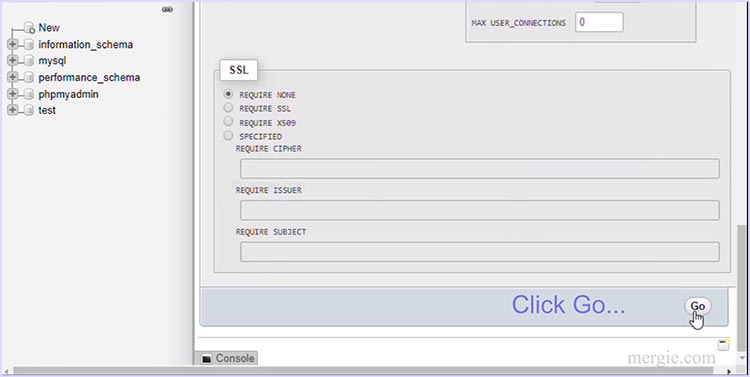
- Grant all global privileges.
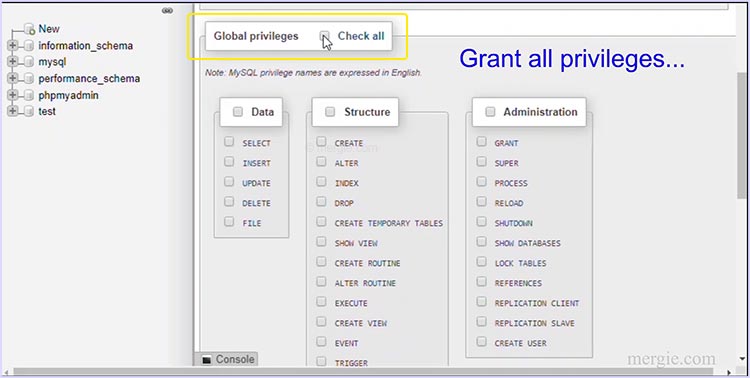
- Click ‘Go’ to create the account.
- Remember the username and password created.
Create a Database:
- Look for the Database tab and click on it.
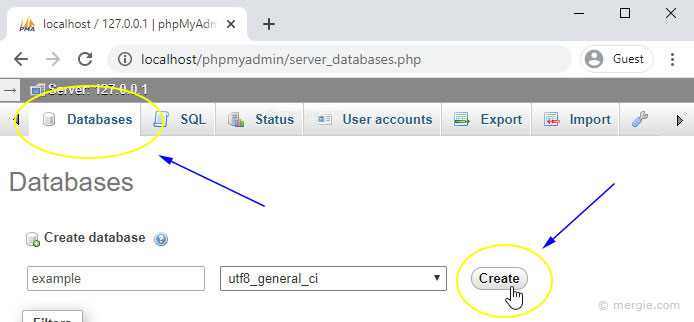
- Type the database name and pick a suitable Collation, I normally go for… utf8mb4_general_ci
- Click the ‘Create’ Button.
Notes:
- Changing the table prefix from the default ‘wp_’. Changing the prefix allows you to easily identify a group of database tables, if you have more than one website, (this is not for security reasons).
- Use the same user account, passwords and database names on your testing server, that you intend to use on your future live web server.
- Make a note of the user account, database names, and the passwords for the WordPress install.
- You can create a database at the same time as creating a user account (There is a checkbox you can select). But it can only be used when the database has the same name as the user account.
- The database tables will be created (and populated) when WordPress is installed…
Video Showing a Database Being Created in phpMyAdmin:

Part 1 – Install a Testing Server

Part 3 – Install WordPress on a Testing Server
